How to Make a Solar Oven
About 3 billion people still cook with open flames or inefficient stoves, so you can build a solar oven that cuts fuel use and uses direct sunlight instead. A solar oven is an eco-friendly alternative that harnesses the power of the sun to cook food efficiently.
You’ll need a rigid box, dark interior surfaces, a clear insulating cover, and angled reflectors to concentrate heat. If you position and seal it correctly, the temperature can climb far enough to cook food.
However, a few design details determine whether it works well. Paying attention to these will help you maximize the oven’s effectiveness and ensure safe, consistent cooking.
Key Takeaways
- Use a sturdy shallow box or insulated container, then line it with black heat-absorbing material.
- Add reflective material like foil or Mylar inside and on hinged reflectors to direct sunlight inward.
- Cover the opening with a clear lid or plastic wrap to trap heat while allowing sunlight to enter.
- Choose a box, panel, or parabolic design based on your cooking goal, materials, and available sunlight.
- Place the oven in direct sun, keep it level, adjust reflector angles, and seal gaps to reduce heat loss.
What You Need for a Solar Oven
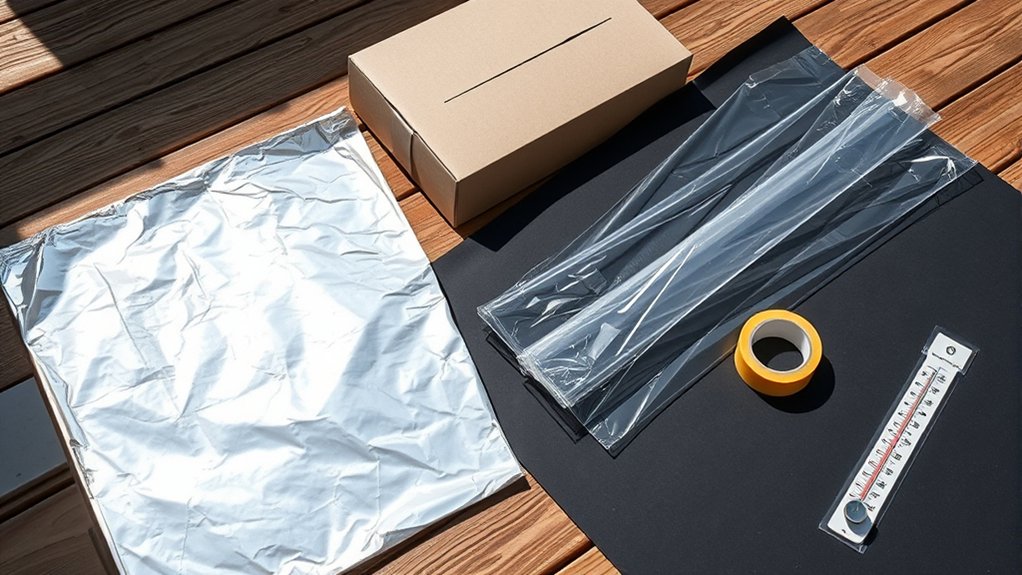
To build a solar oven, you’ll need a shallow cardboard box or similar insulated container, a reflective surface such as aluminum foil or a Mylar sheet, clear plastic wrap or a glass lid for the cover, black construction paper or matte-black paint for heat absorption, and adhesive materials like tape or glue.
Build a solar oven with a shallow insulated box, reflective lining, clear cover, and a black heat-absorbing base.
You should also gather a ruler, scissors, and a utility knife for accurate cutting and assembly. If you’re budgeting, compare material costs and reuse clean packaging when possible.
Insulation improves thermal retention, so add newspaper, foam, or another low-conductivity filler around the box walls if available. Use the dark absorber on the interior base to maximize solar gain.
Keep the transparent cover taut and sealed to reduce convective losses. During troubleshooting, check for light leaks, loose joints, or warped reflective surfaces, because each issue lowers performance.
Measure all components before cutting, so you avoid waste and ensure a precise fit.
Choose the Right Solar Oven Design
Start by matching the oven design to your cooking goal, available materials, and local sun conditions. You’ll usually choose between box, panel, and parabolic designs. A box oven traps heat well, so it works best for slow cooking and baking.
A panel oven is lighter and cheaper, but it relies more on frequent repositioning. A parabolic design concentrates sunlight intensely, so it can reach higher temperatures, but it demands accurate alignment and stricter safety guidelines.
Evaluate design considerations such as insulation, reflector area, aperture size, and expected temperature range. If you want stable performance in moderate sun, prioritize thermal retention over maximum peak heat.
If your site gets strong, direct sunlight, a concentrating design may be efficient. Check how often you can adjust the oven, because tracking the sun affects output.
Also, verify that your chosen materials can tolerate heat and won’t warp, melt, or release fumes. Select the simplest design that still meets your cooking target.
Assemble the Solar Oven Box
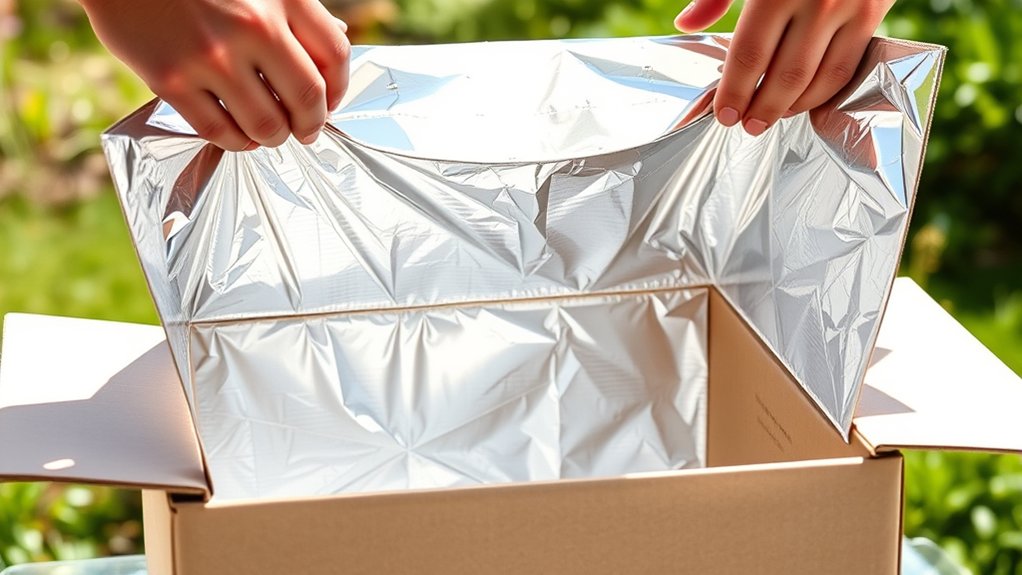
Start by selecting a sturdy box with enough depth and minimal warping so it can hold heat efficiently. Line the interior with a dark, heat-absorbing material to reduce reflective losses and improve thermal retention.
Then attach reflective panels to the lid or sides so you can concentrate more sunlight into the cooking chamber.
Choose The Right Box
A sturdy cardboard box forms the core of your solar oven, so choose one with rigid walls, intact corners, and enough depth to hold the food tray without collapsing under insulation or heat. You should verify that the outer box fits a smaller inner box with uniform spacing, because consistent clearance improves stability and heat capture.
Check for clean seams and dry surfaces; warped or crushed cardboard weakens the structure. Pick a box with a broad opening, since that simplifies assembly, easy maintenance, and access during use. Inspect the lid for flatness so it can support later reflector placement.
Follow basic safety tips: avoid boxes with mold, grease, or weak staples, and replace damaged packaging before building. A sound box gives your oven predictable performance and reduces failure risks.
Line The Interior
With the box selected, line the interior with a reflective surface to improve heat retention and direct sunlight onto the cooking area. You should cover every inner wall and the base with smooth, flat material so the cavity presents a uniform optical finish.
Cut each piece to fit tightly, then secure it with adhesive that won’t warp under heat. Press out bubbles and creases, because uneven surfaces scatter light and reduce efficiency.
If you’re comparing materials, use a simple idea pairing: high reflectivity with low thermal absorption. Avoid an unrelated topic like exterior decoration; it doesn’t affect performance.
Check seams for exposed cardboard, since dark gaps absorb energy. When you’re done, the chamber should appear bright, sealed, and geometrically consistent, ready for the next assembly step.
Add Reflective Panels
Next, you’ll add the reflective panels to assemble the solar oven box, positioning each panel so it redirects incoming sunlight toward the interior cooking chamber. Cut reflective materials to fit the lid flaps, then fasten them with adhesive or rivets so they lie flat and wrinkle-free.
You should orient each panel at the same angle to maximize solar gain and reduce scattering losses. Check that no sharp edges protrude, since solar oven safety depends on stable, snag-free surfaces.
Seal seams where panels meet the box to limit heat leakage and improve thermal retention. If the panels flex, reinforce the backing with cardboard or thin wood.
Finally, test the alignment in direct sun and adjust until light concentrates evenly inside the insulated cavity.
Line and Seal the Oven Interior
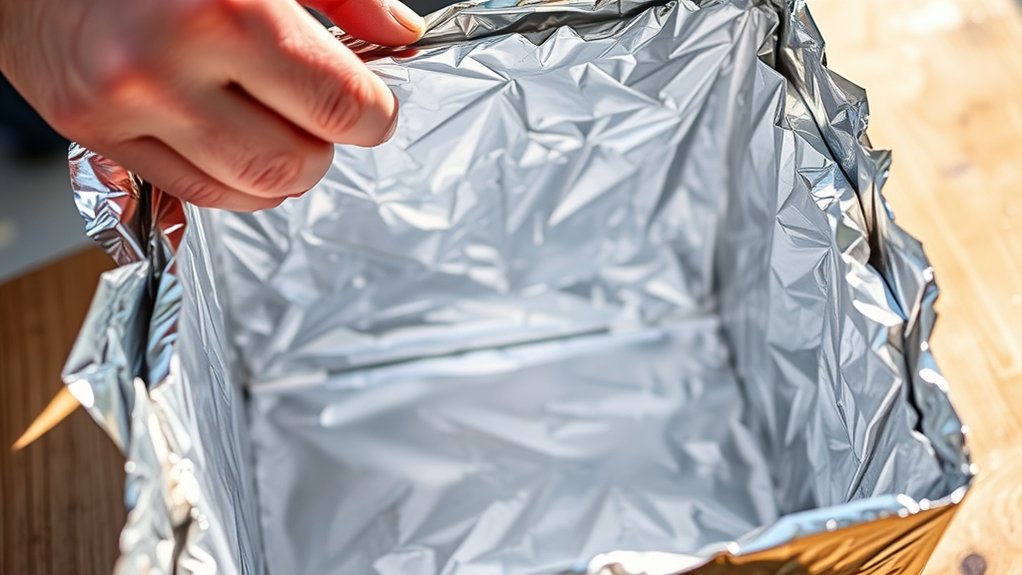
Choose a reflective material, such as aluminum foil or reflective insulation, and line all interior surfaces of the box to maximize solar energy concentration. You should cover the walls and bottom completely, keeping the surface as smooth and continuous as possible to reduce light loss.
Seal all gaps tightly with tape or adhesive so heat can’t escape and outside air can’t enter.
Choose Reflective Material
Why does the lining matter so much? You need a surface that redirects as much solar radiation as possible into the cooking cavity, because every lost photon reduces thermal gain.
For short term storage, use a smooth, heat-tolerant backing that won’t warp under repeated heating cycles. Then evaluate reflective material choices by comparing specular reflectance, durability, and ease of adhesion.
Aluminum foil gives high reflectance and low cost, but you should press out creases, since wrinkles scatter light. Mylar or metallized film can outperform foil if you mount it flat and secure it with a stable adhesive. Avoid dark glues that absorb energy.
Trim overlaps cleanly, seal exposed edges, and keep joints tight so you maintain a uniform, efficient interior finish.
Cover Interior Surfaces
Once you’ve selected the reflective layer, line every interior wall, the base, and any hinged panels so the oven presents a continuous, high-reflectance cavity. You should trim material to fit flush, then apply it with a smooth, even bond to maximize specular return and reduce absorption.
Keep the interior geometry clean and planar; wrinkles scatter light and lower thermal gain. Pay close attention to surface alignment to ensure the light path remains uninterrupted, which improves heat retention.
Cover all exposed inner faces. Match edges precisely to panel contours. Verify a uniform reflective finish.
Seal Gaps Tightly
Check every seam, corner, and panel junction so no light leaks through the oven’s interior shell. You’ll maximize heat retention by sealing each opening with high-temperature silicone, foil tape, or weather-resistant adhesive.
Press the sealant into cracks, then smooth it to create a continuous barrier that blocks convective loss and prevents radiant escape. Inspect the door edge, hinge side, and any probe or vent penetrations.
If gaps remain, add gasket material or overlapping trim. For solar baking, even small leaks reduce internal temperature and extend cook time, so test the enclosure in bright light and watch for stray beams. Reapply sealant where needed, and confirm that the interior stays airtight, stable, and reflective before you use the oven.
Add Reflectors to Trap More Sunlight
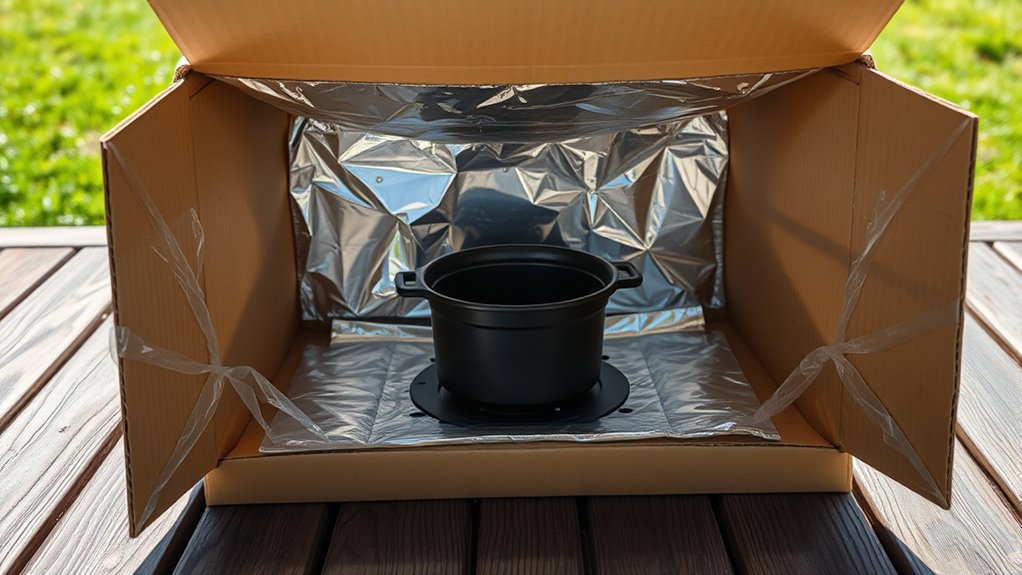
To increase the oven’s heat gain, add reflectors around the opening to redirect additional sunlight into the cooking chamber. You can use cardboard, foil, or mirrored plastic cut into flat panels and hinge them to the lid edges.
Add reflectors around the opening to redirect more sunlight into the cooking chamber.
Angle each reflector so incoming rays bounce onto the dark interior rather than away from it; even small adjustments can improve solar efficiency. Choose rigid backing to keep the surfaces planar, because warped panels scatter light and reduce concentration. Keep the reflective face clean, since dust lowers output.
For practical two word ideas, think hinge alignment, panel angle, and edge sealing.
- Maximize reflected area without blocking the aperture.
- Align panels symmetrically to concentrate light evenly.
- Recheck angles as the sun shifts to maintain gain.
Test the setup by measuring internal temperature before and after reflector placement. If temperatures rise faster, your reflector geometry is working as intended.
Position Your Solar Oven in the Sun
Place your solar oven where it receives direct, uninterrupted sunlight for the longest possible period. You should orient the opening toward the current sun angle and keep the cooker level so the absorber faces incoming rays efficiently.
For effective positioning sun control, check the site for trees, walls, and railings that could cast moving shadows. Shade avoidance matters because even brief obstruction lowers internal temperature and reduces thermal gain.
| Factor | Target | Effect |
|---|---|---|
| Sun exposure | Full | Maximizes input |
| Ground surface | Stable | Prevents tilt |
| Nearby obstructions | None | Limits shade |
Adjust placement as the sun shifts, and verify that reflectors still aim light into the aperture. If wind or uneven ground changes orientation, reposition the unit immediately.
Precise placement improves energy capture, shortens warm-up time, and keeps performance consistent throughout the cooking interval.
Test Cooking Time and Heat Levels
Start by testing a small batch of food and recording the time it takes to reach a safe, edible temperature. Use identical containers, a lid, and the same food mass each run so your test cooking data stays comparable.
Measure the internal temperature at fixed intervals, then note how changes in sun angle, cloud cover, and reflector position affect heat levels. If the temperature rises slowly, extend the exposure and keep the oven sealed between readings.
Track start time, peak temperature, and total cook duration. Compare results across different hours to map heat levels. Repeat the test with another food type to verify consistency.
Analyze the results to estimate average cooking times for future meals. You’ll use these measurements to schedule cooking more accurately and to decide when the oven performs best under current conditions.
Fix Common Solar Oven Problems
If your solar oven isn’t heating well, inspect the lid seal, reflector angle, and absorber surface first, because small alignment errors can cut performance sharply. You should close gaps with high-temperature tape or weather stripping, then retest in full sun.
Inspect the lid seal, reflector angle, and absorber surface first, then retest in full sun.
If heat still leaks, tilt the reflectors toward the sun and verify that the glass or clear cover stays clean, because dust lowers transmission. Darken any shiny interior spots with matte black paint so the absorber converts more radiation into heat.
If food cooks unevenly, rotate the pot and reposition it to the focal zone. For off grid cooking, you need consistent orientation, so track the sun every 20 to 30 minutes.
Don’t trust solar cooker myths that blame only cloudy weather; many failures come from poor insulation, warped panels, or oversized cookware. Measure internal temperature with a probe, note changes, and adjust one variable at a time to isolate the fault.
Frequently Asked Questions
How Long Will a Solar Oven Stay Hot After Sunset?
Usually, you’ll keep usable warmth for 1 to 3 hours after sunset, depending on heat retention, insulation, and air sealing.
Better sun propulsion during cooking boosts temperature, but cooler nights shorten it fast.
Can I Cook Multiple Dishes at Once in a Solar Oven?
Yes, you can cook multiple dishes at once, but you’ll trade solar oven efficiency. Like a chamber orchestra, your setup needs balance; use shallow, dark cookware, stack carefully, and monitor heat distribution closely.
What Foods Are Best for Beginner Solar Oven Cooking?
You’ll get the best results with foods that heat evenly, like nachos, sliced vegetables, quesadillas, oatmeal, and pre-cooked rice. Use beginner tips: choose thin, moist foods and discussion ideas about simple, forgiving recipes.
How Do I Clean a Solar Oven After Use?
You’ll tidy the sun-warmed chamber with soft cloths, mild soap, and water; avoid abrasives. Wipe reflective panels gently, dry fully, and inspect seals.
Follow cleaning tips on your maintenance checklist after each use.
Is It Safe to Leave a Solar Oven Unattended?
No, you shouldn’t leave a solar oven unattended unless you’ve verified stable safe handling and minimal wind exposure. You’ll need periodic checks to prevent overheating, shifting reflectors, or accidental ignition of nearby materials.
Conclusion
You’ve built the box, sealed the joints, and aligned the reflectors; now you’re ready to cook with sunlight. You’ve trapped heat, reduced loss, and strengthened performance with each adjustment.
You can set the oven level, position it toward the sun, and monitor temperature with precision. You’ll see the results in warmer interiors, faster heating, and more consistent cooking.
With careful testing, you’ll improve efficiency, solve problems, and turn simple sunlight into reliable thermal energy. This is the key to mastering how to make a solar oven.